
How to use Razorpay with WooCommerce
Step 1: Install Plugin
There are two methods to install the Razorpay WooCommerce plugin:
- Download the plugin from WordPress plugin directory
- OR Install plugin manually
Install via the WordPress Plugin Directory
- Download the plugin and install it from the WordPress Plugin Directory.
Manual Installation
- Download thelatest Source code zip file from the Releases section in GitHub.
- Unzip and upload contents of the extension to your
/wp-content/plugins/directory.
Step 2: Configure WooCommerce
- Log into yourWordPress account and activate the Razorpay plugin in the WordPress Plugin Manager.
- Log into yourWooCommerce account , navigate to Settings and click theCheckout/Payment Gateways tab.
- Click Razorpay to edit the settings.
- Enable the Payment Method, name it Credit Card / Debit Card / Internet Banking (This is shown on the Payment page your customer sees.).
- Add in your
<key_id>and<key_secret>generated from the Razorpay Dashboard. - Set the Payment Action to Authorize and Capture to auto-capture payments. If you want to capture payments manually from the Dashboard after manual verification, set the Payment Method to Authorize.
Step 3: Set Up Webhooks
Webhooks are triggered when certain events occur. Subscribe to webhook events to receive notification (in the form of a webhook payload) when these events occur. Setting up webhooks makes your integration more robust, and guards again issues arising from poor connectivity. The webhook URL is available on the plugin's settings page. You must copy it from there and use it to set up webhook on the Razorpay Dashboard.
You can set up multiple URLs to receive webhook notifications.
To setup webhooks:
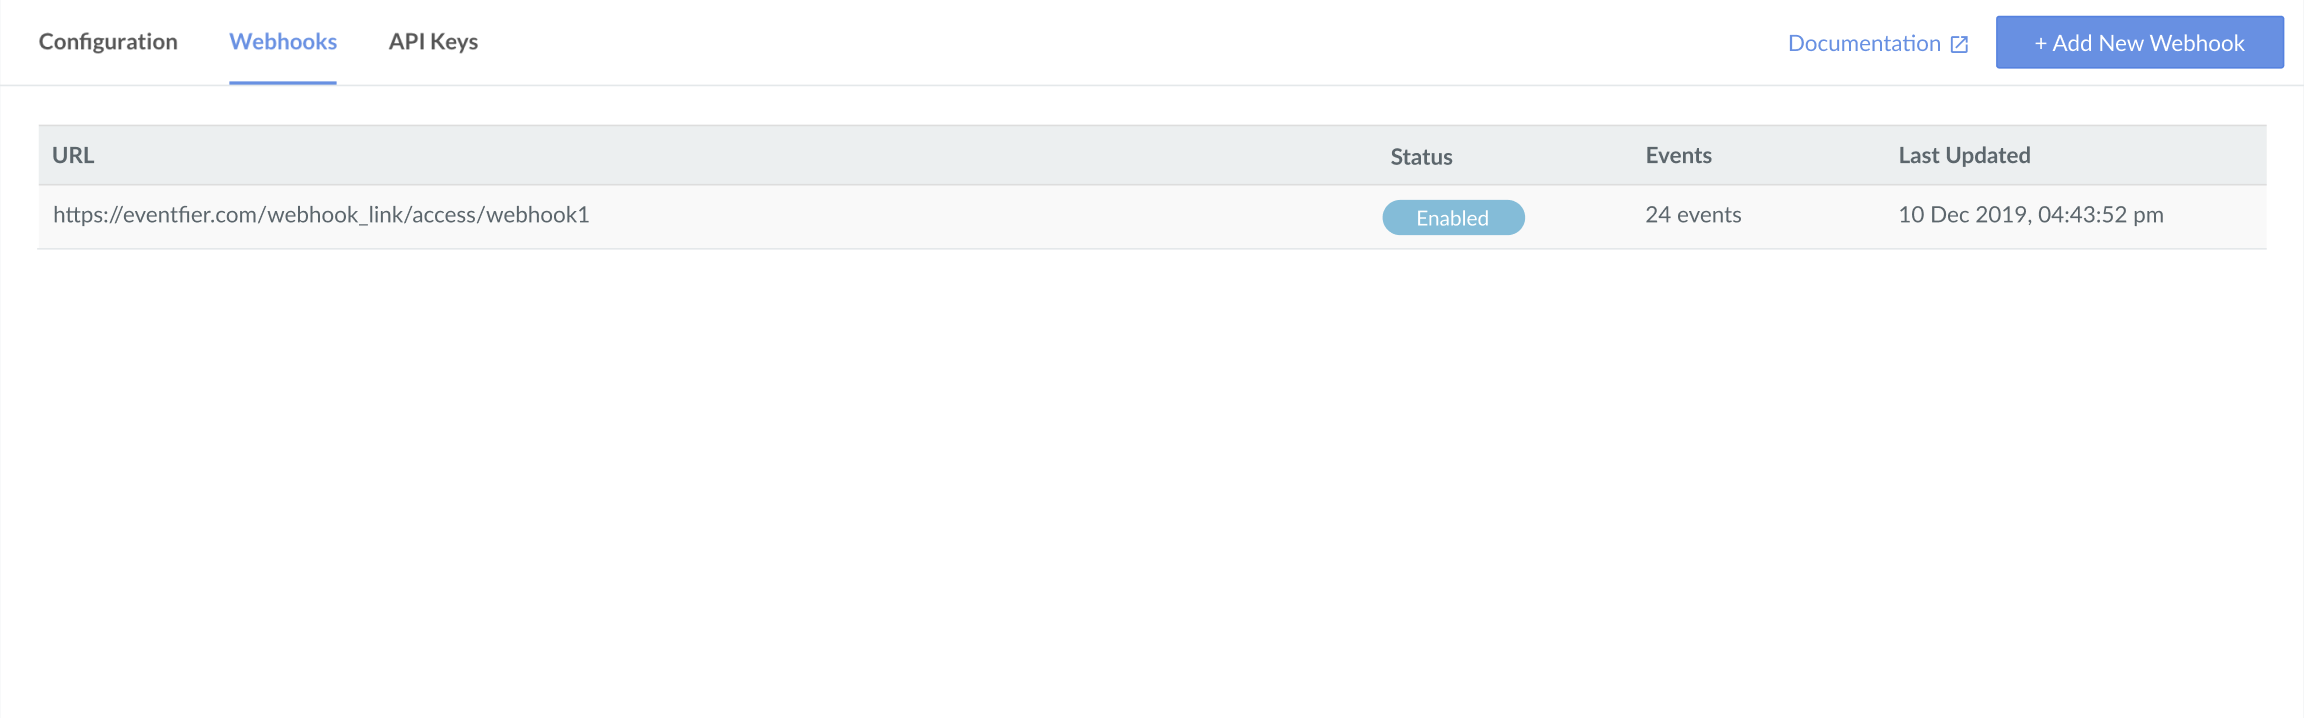
- Log into yourRazorpay Dashboard and navigate to Settings → Webhooks.
Click + Add New Webhook.

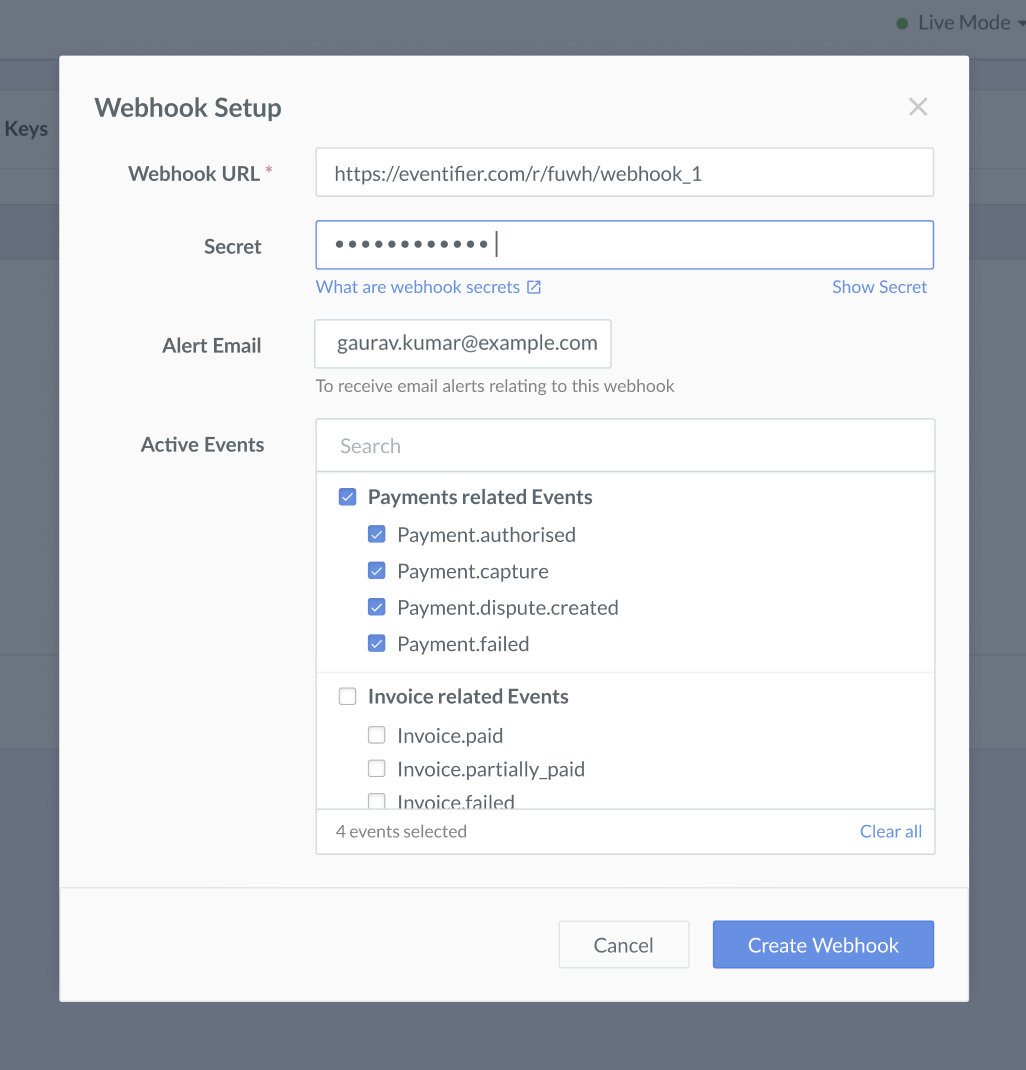
- In the Webhook Setup modal:
- Enter the URL where you want to receive the webhook payload when an event is triggered. We recommended using an HTTPS URL.
Note:
Webhooks can only be delivered to public URLs. If you attempt to save a localhost endpoint as part of a webhook set-up, you will notice an error. Please refer to the test webhooks section for alternatives to localhost. - Enter a Secret for the webhook endpoint. The secret is used to validate that the webhook is from Razorpay. Do not expose the secret publicly.Learn more about Webhook Secret.
- In the Alert Email field, enter the email address to which notifications must be sent in case of webhook failure.
- Select the required events from the list of Active Events.Sample payloads for all events are available.
- Enter the URL where you want to receive the webhook payload when an event is triggered. We recommended using an HTTPS URL.
- Click Create Webhook.
Once created, it appears on the list of webhooks:
Watch the short animation for more details.
List of Events to Subscribe
You must subscribe to the following events:
Plugin | Webhook Events Supported |
|---|---|
WooCommerce |
|
Step 4: Accept Live Payments
After testing your WooCommerce store, when you are ready to accept live payments:
Generate the
<key_id>and<key_secret>in the Live mode on your Razorpay Dashboard.
- Enter the Live mode
<key_id>and<key_secret>in your WooCommerce store.