Intuit Quickbooks
Accounting Software
With your accounting data organized on the cloud, you can track sales, create and send invoices, and know how your business is doing at any time.
What's more, it's easy to use and you need not be an accounting or finance expert to use QuickBooks Accounting Software.
Connect your bank account to automatically import and categorize transactions. Sync with popular apps and easily snap photos of your receipts to store them with QuickBooks Mobile.
Powerful invoicing features such as invoice tracking, payment reminders are at your fingertips. What's more, is that you can access dozens of reports & manage your expenses. All power packed in one single solution — QuickBooks Accounting Software. What's more, you can also use our mobile app to manage your business on the go!
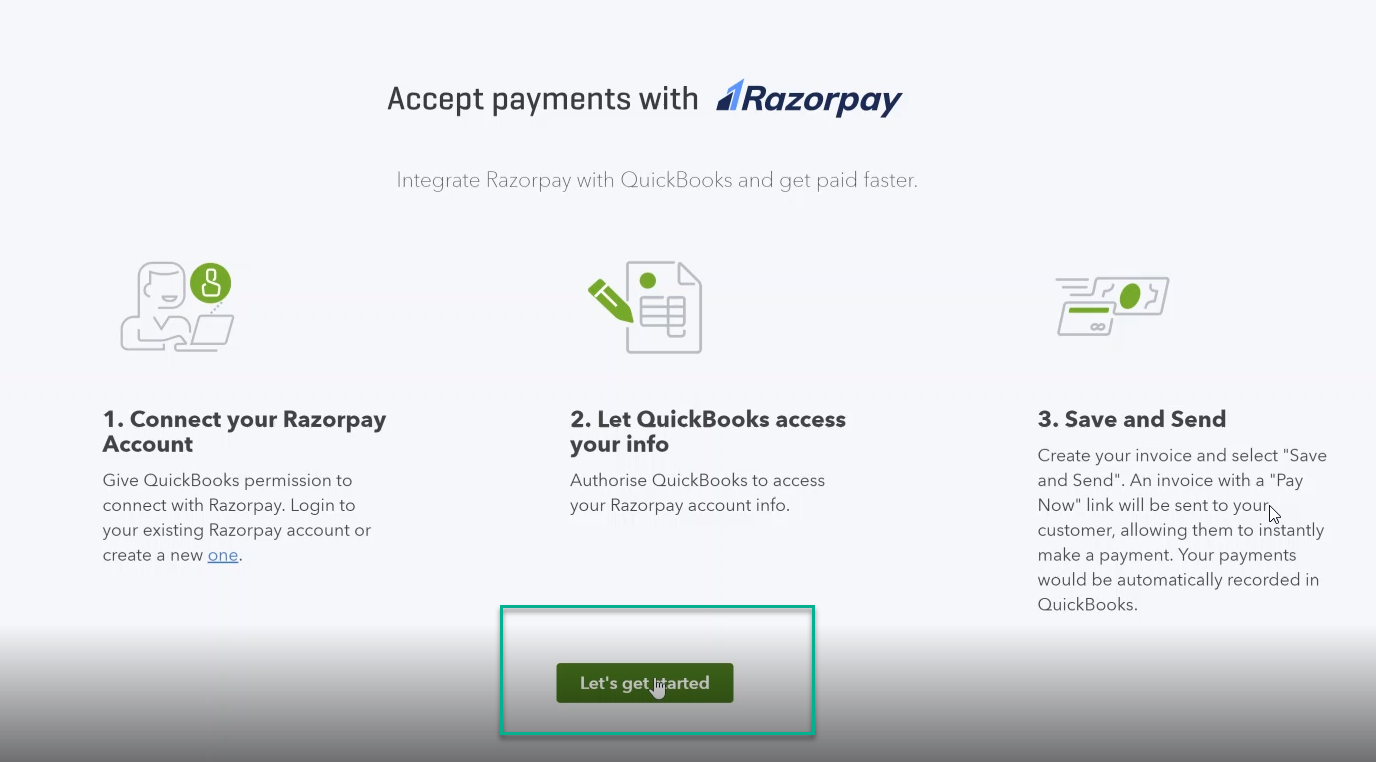
How to use Razorpay with QuickBooks
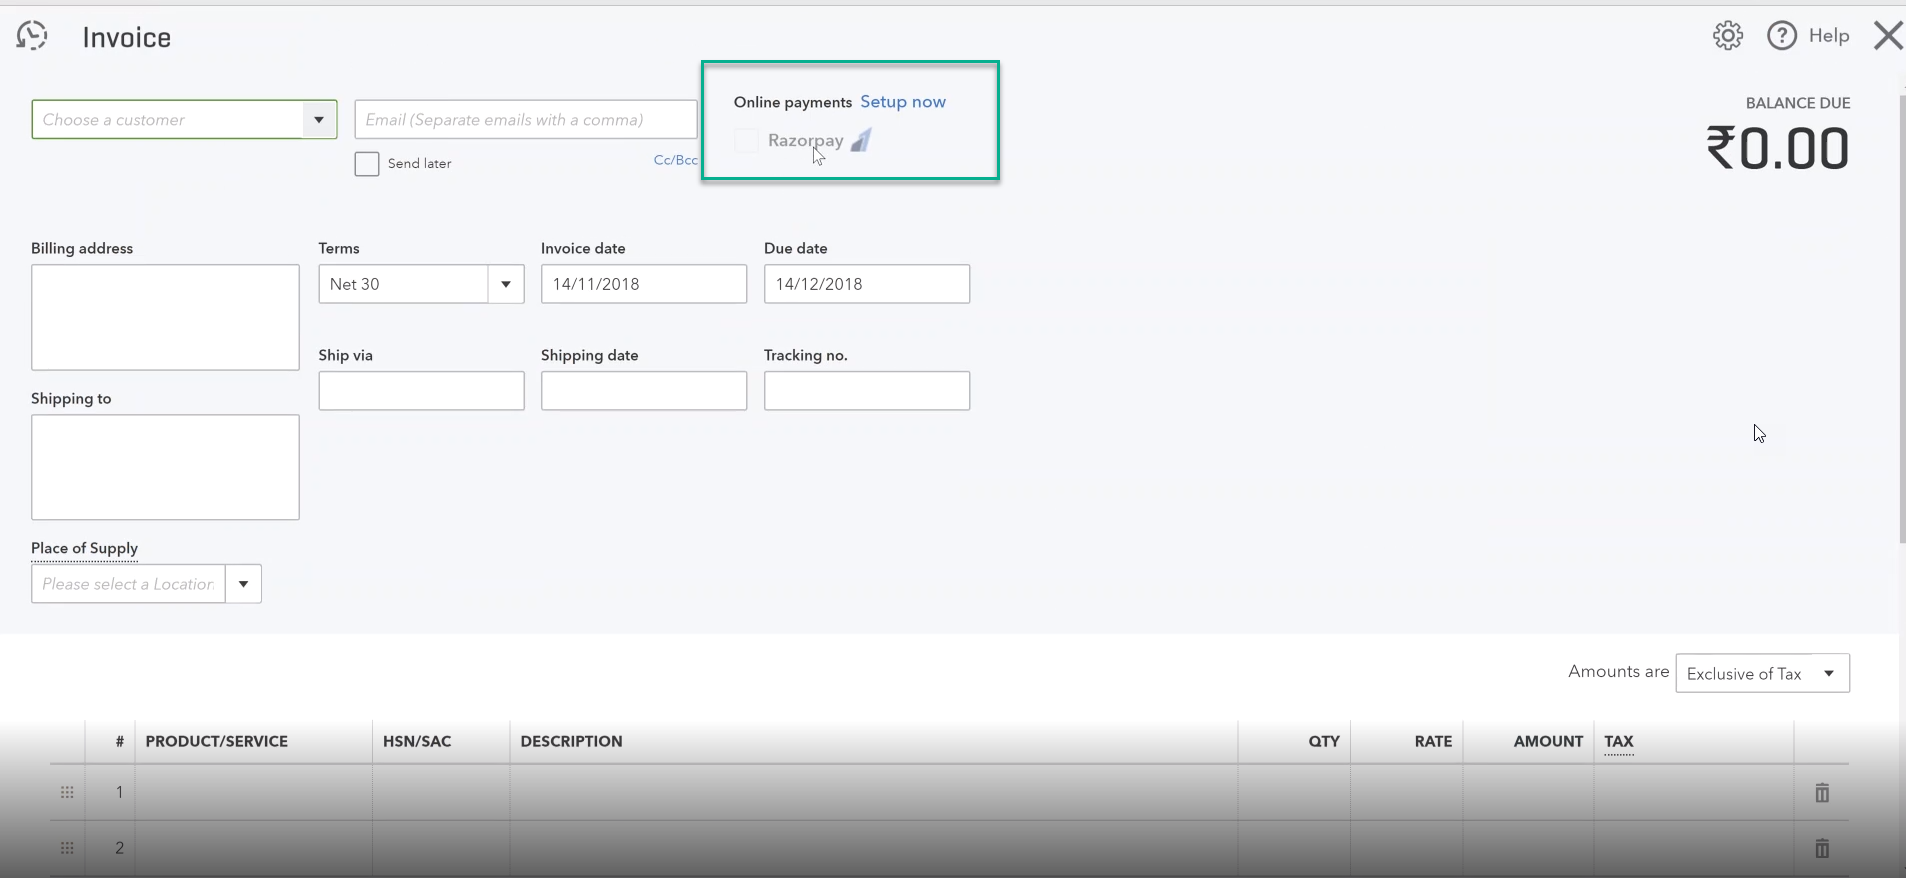
- Select the + New icon on the left and select Invoice.
In a new Invoice, you will see the option to make Online payments. Click Setup now.
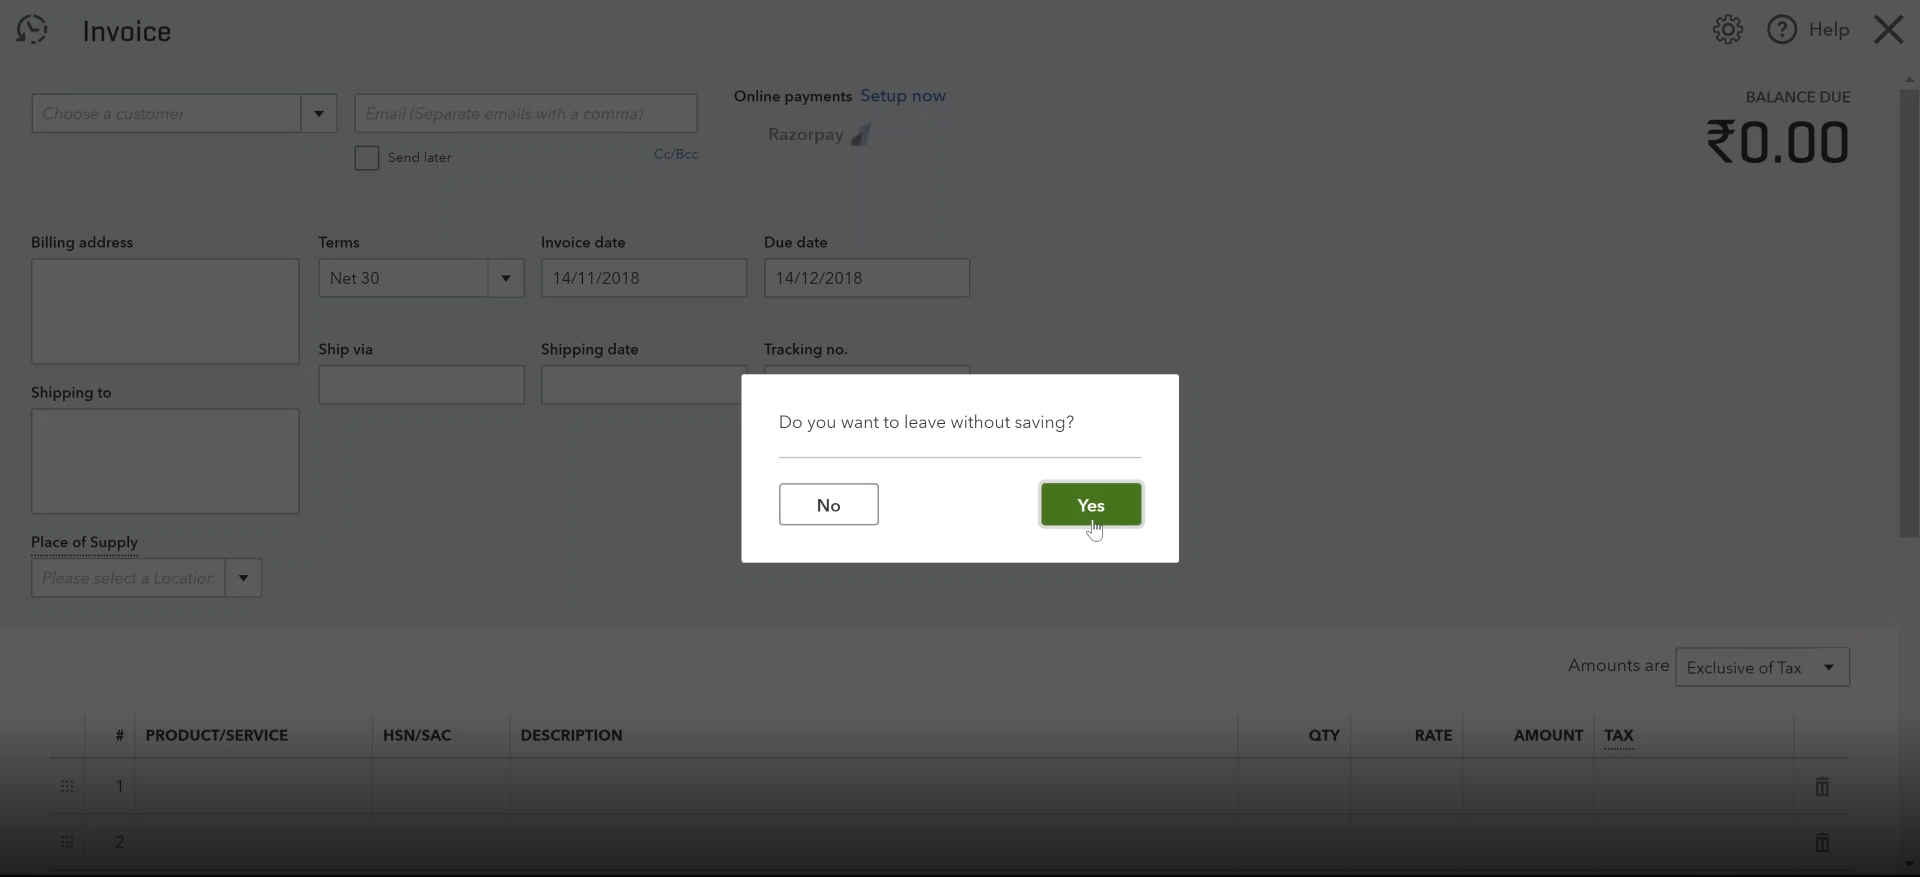
A decision box will appear asking whether you want to leave without saving. Click Yes.
You will be directed to a Razorpay QuickBooks integration page. Under Connect your Razorpay Account, click one to create a new Razorpay account.
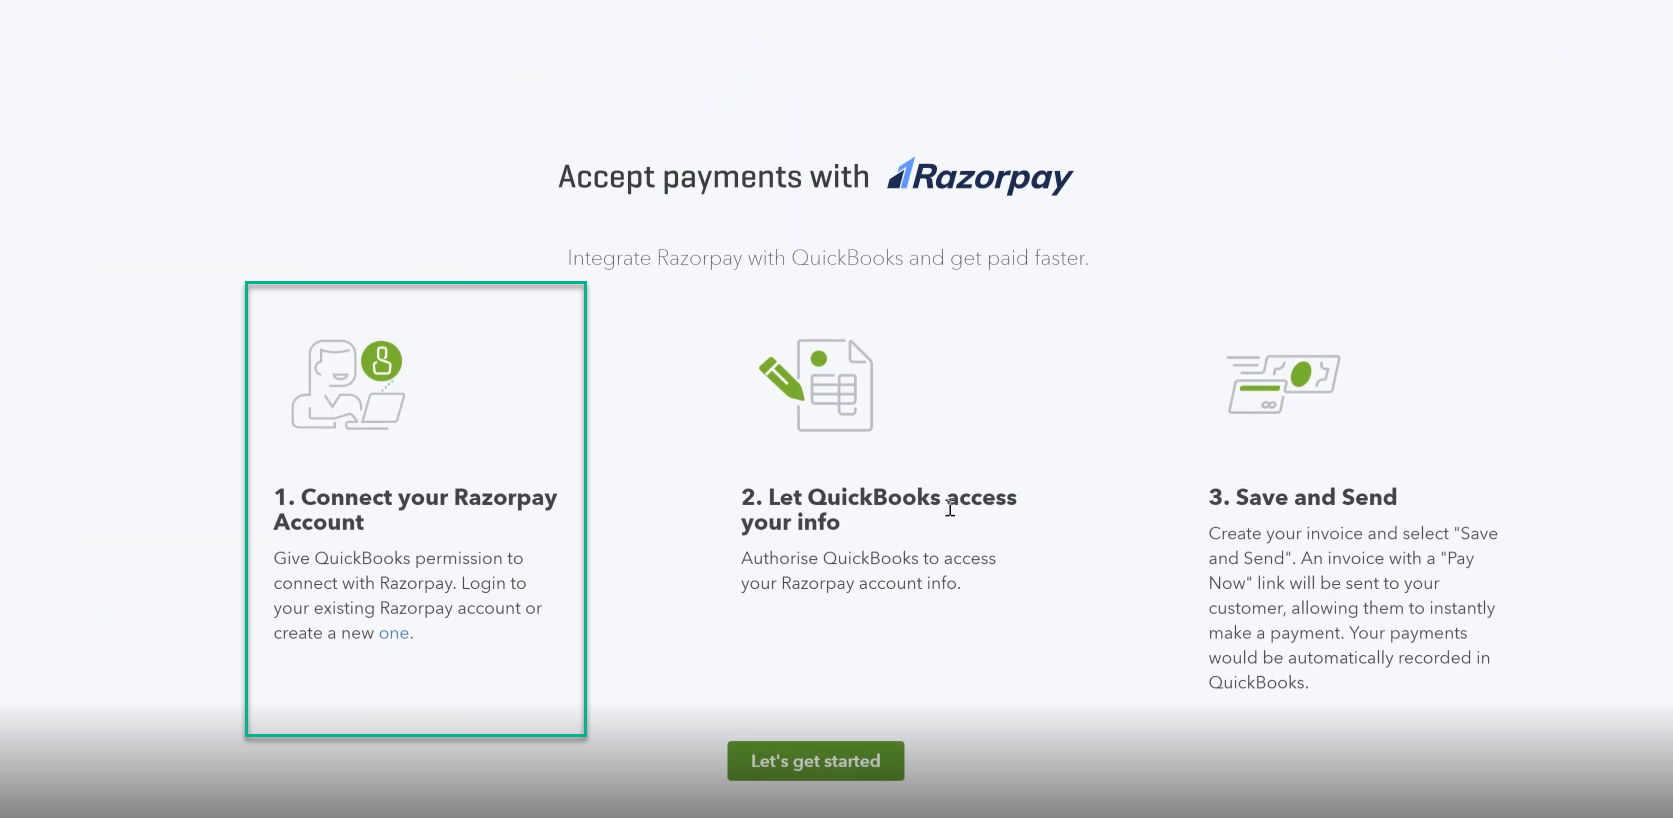
Once your account is set up, go back to QuickBooks and click Let’s get started.
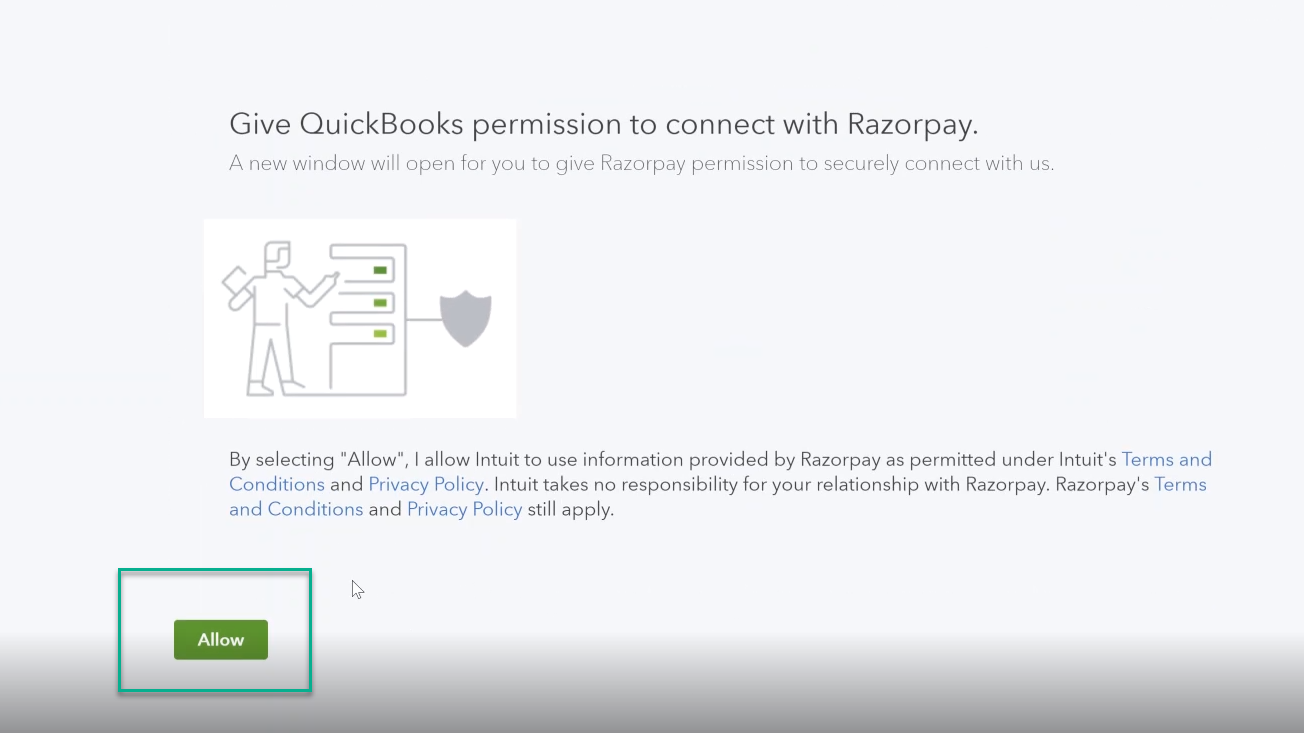
If you are not signed in to your Razorpay account in the same browser window, you will be asked to log in and thereafter you will be prompted to give QuickBooks permission to connect with Razorpay. Click Allow.
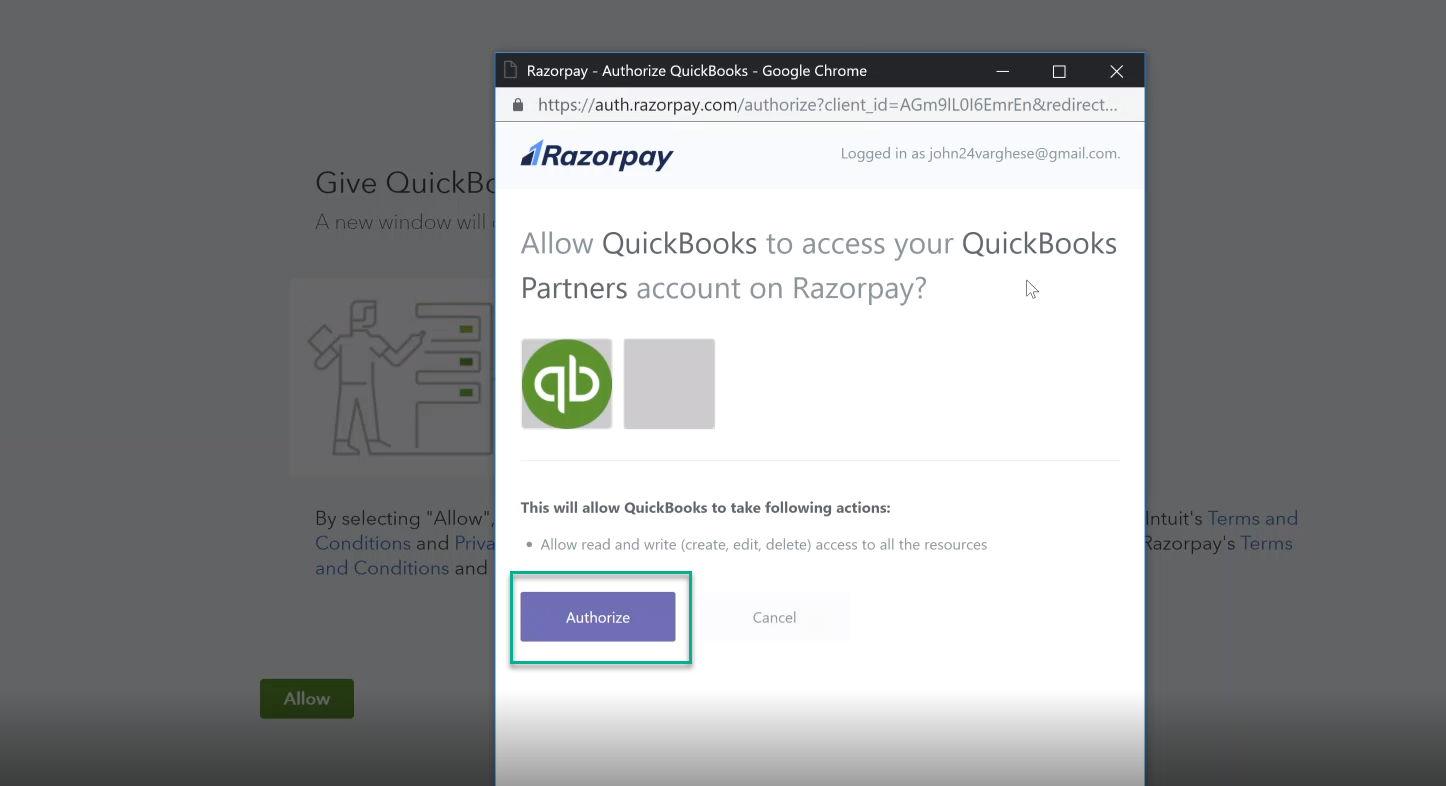
- Check if any pop-ups are blocked and unblock them.
Click Authorise to let QuickBooks access your Razorpay account.
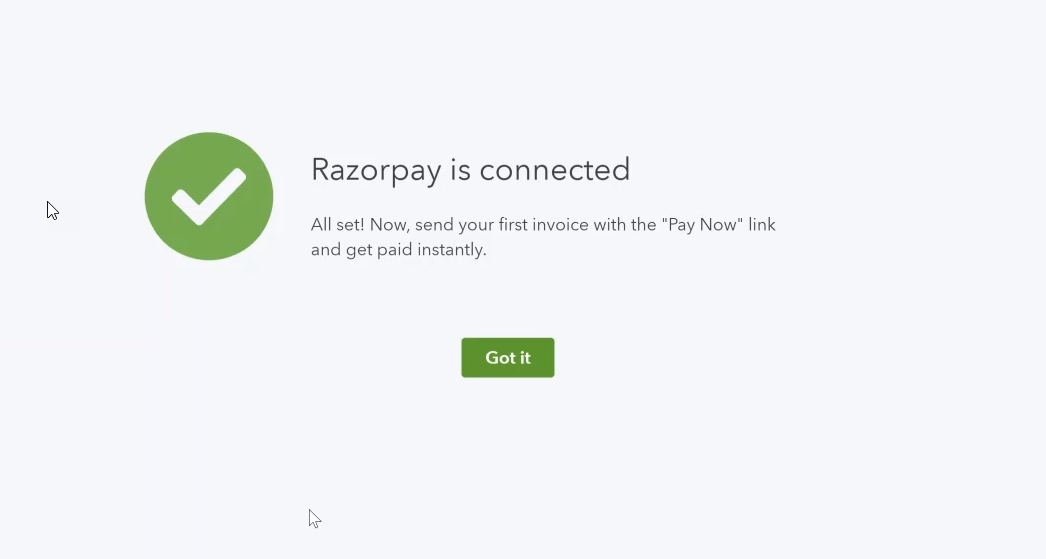
You will get a success notification.