

Creating online video tutorials is not just beneficial; it’s easy!
They say a picture is worth a thousand words. But what about a video? A video is worth a million words.
Over the years, digital video has become the most popular training and education dissemination tool. With attention spans becoming shorter, more people watch videos to accomplish their tasks instead of reading articles. According to TechSmith, 83% of folks would rather watch videos than access instructional content via text or audio. Many organisations have begun to invest in videos as part of their content strategy.
At Razorpay too, we realised that many users wanted video walkthroughs for integrations and not lengthy articles – we heard and delivered. And users loved it! With our first 3 integration videos, we recorded a decrease in integration-related support tickets by more than 50%!
But how to start with video creation? What points should one keep in mind? This blog covers all that and more.
Pre-work
Some groundwork is essential before you start creating a video, such as identifying your target audience and defining the success criteria.
Define Target Audience
Understand the audience for whom you are designing this video.
- Who is your audience?
- What is the user’s goal? What problem are they trying to solve?
- Where do your users typically try to find this information?
Example
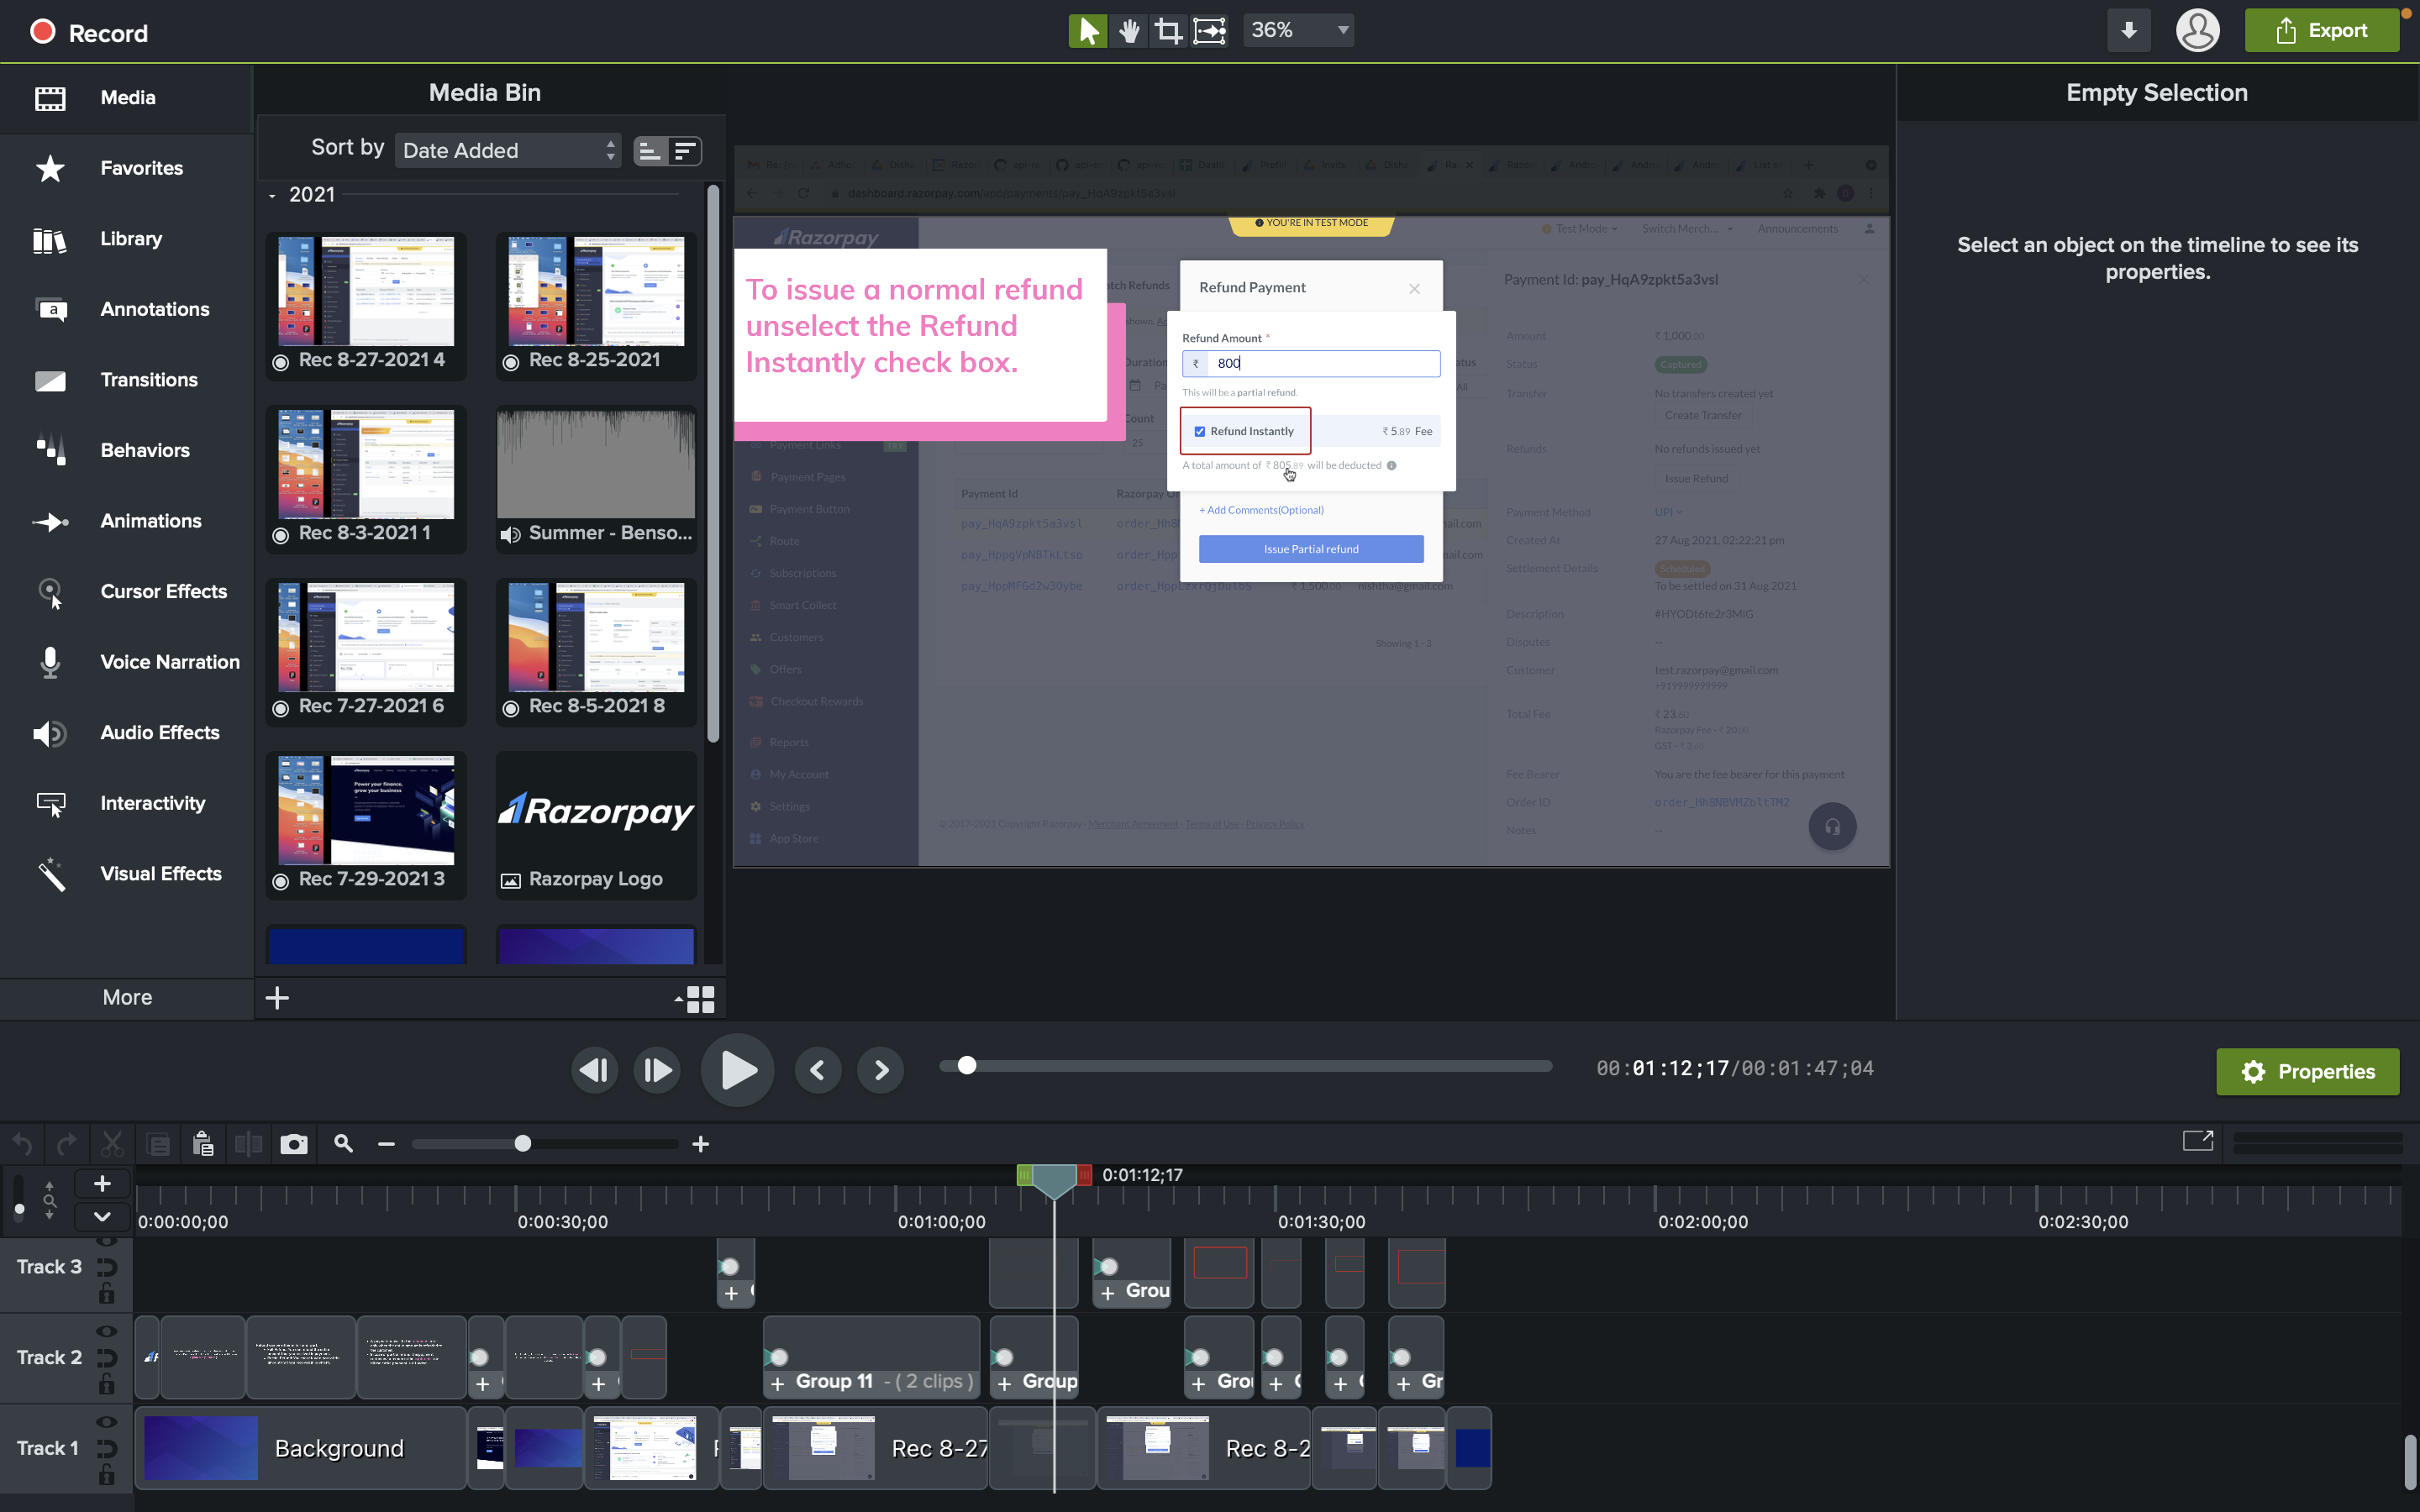
Let’s take an example where we are trying to create a video that explains how Razorpay merchants can issue refunds to their customers using the Razorpay Dashboard.
- The target audience is businesses that use Razorpay to accept customer payments and want to know how they can issue refunds using the Razorpay Dashboard. Since large enterprises usually use our Refunds APIs, it is mostly businesses from the SME segment that are going to use the Razorpay Dashboard to issue refunds.
- The goal is to issue refunds to customers – which could be partial or full.
- Typically businesses try to find this information on the Razorpay Documentation portal.
Define Success Metrics
It is essential to define the performance metrics for any type of new initiative you take.
- How many views and shares do you target this video to get?
- What would be the average watch duration?
- Do you expect to get more subscribers to your blog/channel/account after it? How many new subscribers?
- Any other metrics such as support ticket reduction.
Setting these metrics is vital as they help you to measure the outcomes and finetune your plans.
Video Creation
Now that you have set the ground, it’s time to create the video. But wait, you need to decide on a tool to create the video and also write the script.
Select the Video Creation Tool
The market offers many free and paid video creation tools. Choose the one that fits your use case. Some of the factors to consider while deciding on a tool:
- Learning Curve: Tools such as Loom and Canva are easy to work with. It will take just a few hours to get the hang of it. On the other hand, some tools, such as Adobe Captivate and TechSmith Camtasia have a steeper learning curve.
- Output Format: If you design e-learning courses with in-built quiz modules, you need a tool which supports these features, such as Adobe Captivate. If simple MP4 or MOV outputs are alright, you can opt for free or open-source tools.
- Budget: An important factor to consider if you are just getting started with video content. Investing too much initially may or may not pay off.
Tip! We recommend giving the trial versions a spin before choosing the tool – free or paid.
- Freeware/Freemium: Create a simple video with screen recordings and images. You can use Windows Movie Maker or iMovie. Even Microsoft Powerpoint can help you create such videos. Or you can try cloud tools such as Loom or Canva.
- Paid: If you are looking for a tool that provides more room for customisations, effects, audio integration and so on, you can go for the industry favourites Adobe Captivate or TechSmith Camtasia. These come with built-in audio and visual templates that you can customise and use.
- Effects/Animations: If you are looking to add a lot of animations, you can choose a tool like Animaker or Adobe After Effects. If you want simple, low-jazz videos, TechSmith Camtasia is a good choice.
Write the Script
Write the script for your video. You can refer to a few videos, read manuals or do hands-on with the product to come up with a simple and easy flow of the video. Your script can consist of these sections:
- Introduction: A short introduction that conveys the main goal.
- Body: This consists of the steps to be performed on the product.
Tips: If there are any tips or shortcuts that can make this process easier, add those.
- Conclusion: Conclude the video with a summary if needed and thank the user for watching. You can also suggest any additional resources the user can look up.
Get your video script validated before you jump into creating videos. Video edits at times require quite a bit of effort.
Create the Video
Video creation involves bringing to life the various sections of your scripts – introduction, body and conclusion using a mix of animations, graphics, software/browser screen recordings and text callouts.
- Add the text slides.
- Do the screen recording.
- Add callouts.
Best Practices
- Add a short introduction to the video to set the expectations.
- Don’t add too much text or callouts. Users are here to watch, not read.
- Time the slides and callouts correctly.
- Use colour, design elements and animations to make your video interesting. Don’t overdo it!
- Finish up with a conclusion.
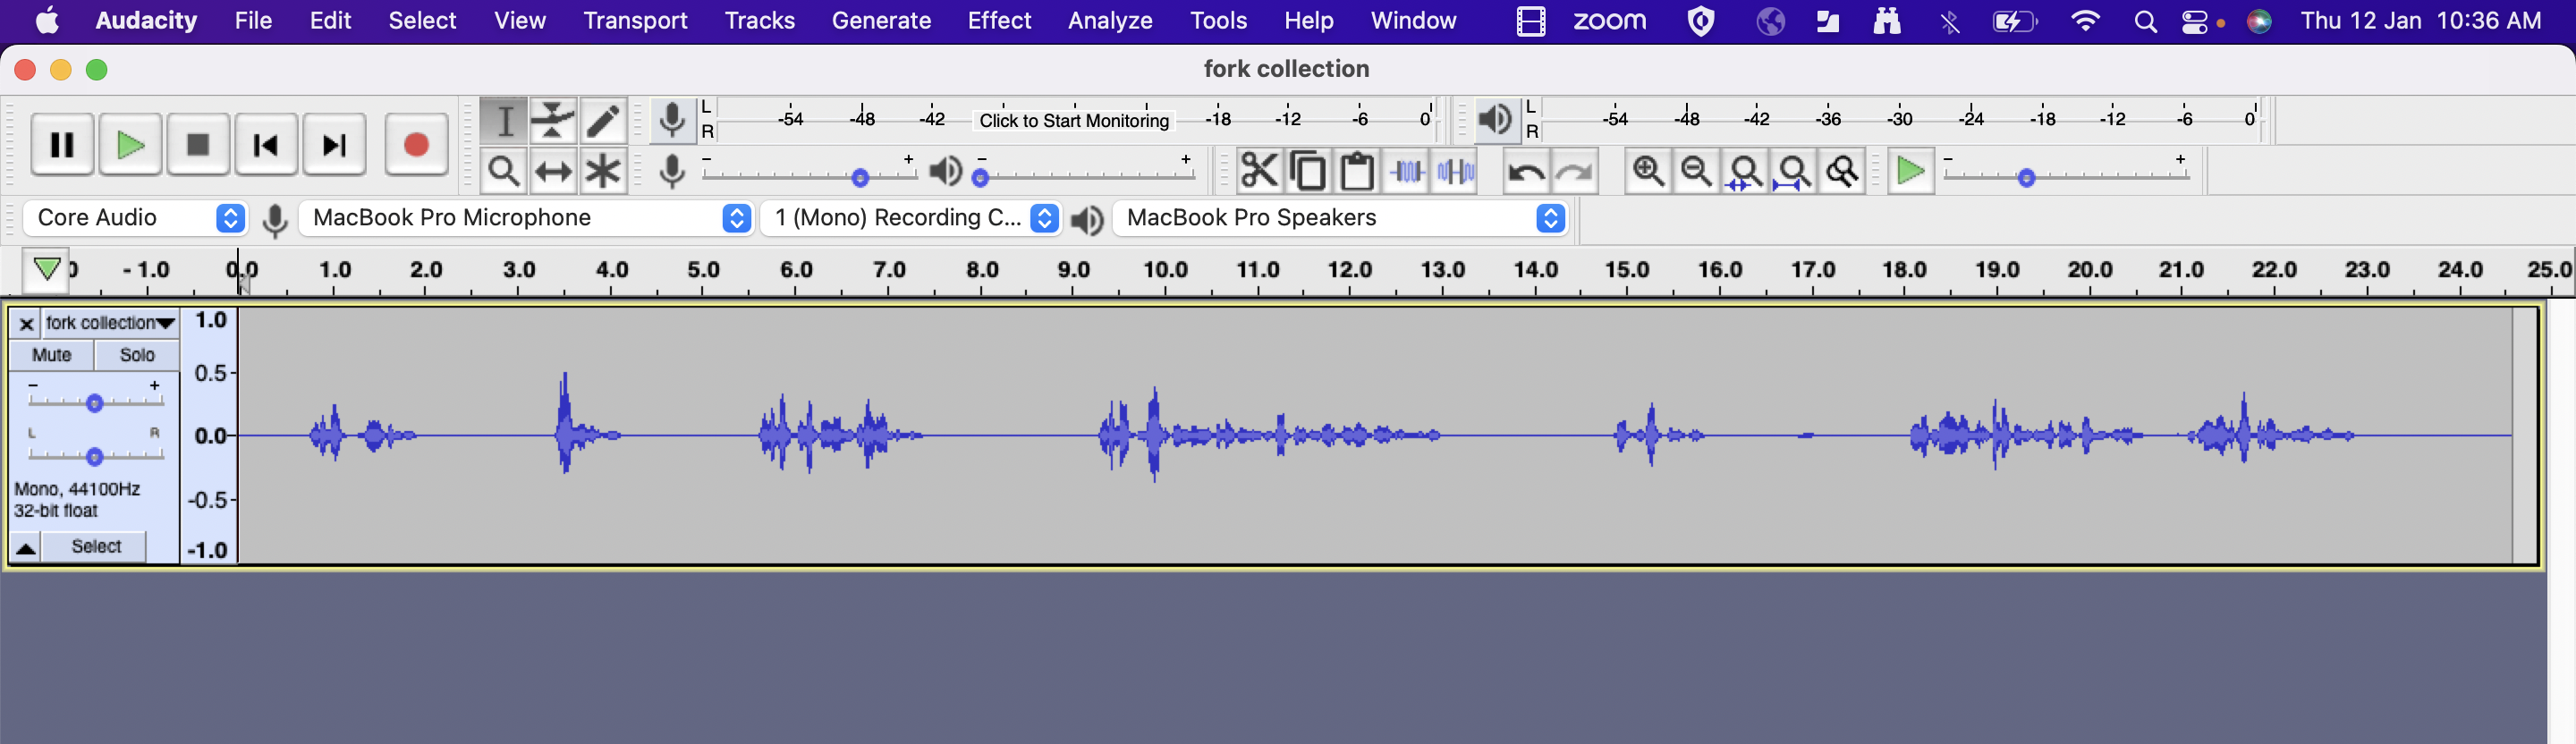
Record Voiceover
Voiceover is an optional step. For short videos, voiceover may not be required. Adding a background music track would suffice. However, for longer videos, voice-overs are very effective.
For voiceovers, it is important to select:
- Voice artist: Choose the right voice-artist since accent and tone play a crucial role. You can also choose to use AI-powered text-to-voice converters.
- Good-quality audio device. You can start with your everyday earphones/hands-free or even your smartphone. But it is worth investing in a professional audio device if you need to create more professional videos.
- Audio recording and processing tool: An excellent audio recording software ensures that your voice quality is retained. You can also use the tool to process the audio further and eliminate background noise. Some tools to consider are Audacity and Adobe Audition.
Final Steps
Put everything together.
- The audio should sync with the actions on the screen
- Check the pace of the slides and the voice-over.
- Add a speech-to-text feature to display the voice-over as text.
Check, re-check, get reviews and approvals, and yes, it’s time to share it with the whole world!
Post-Creation
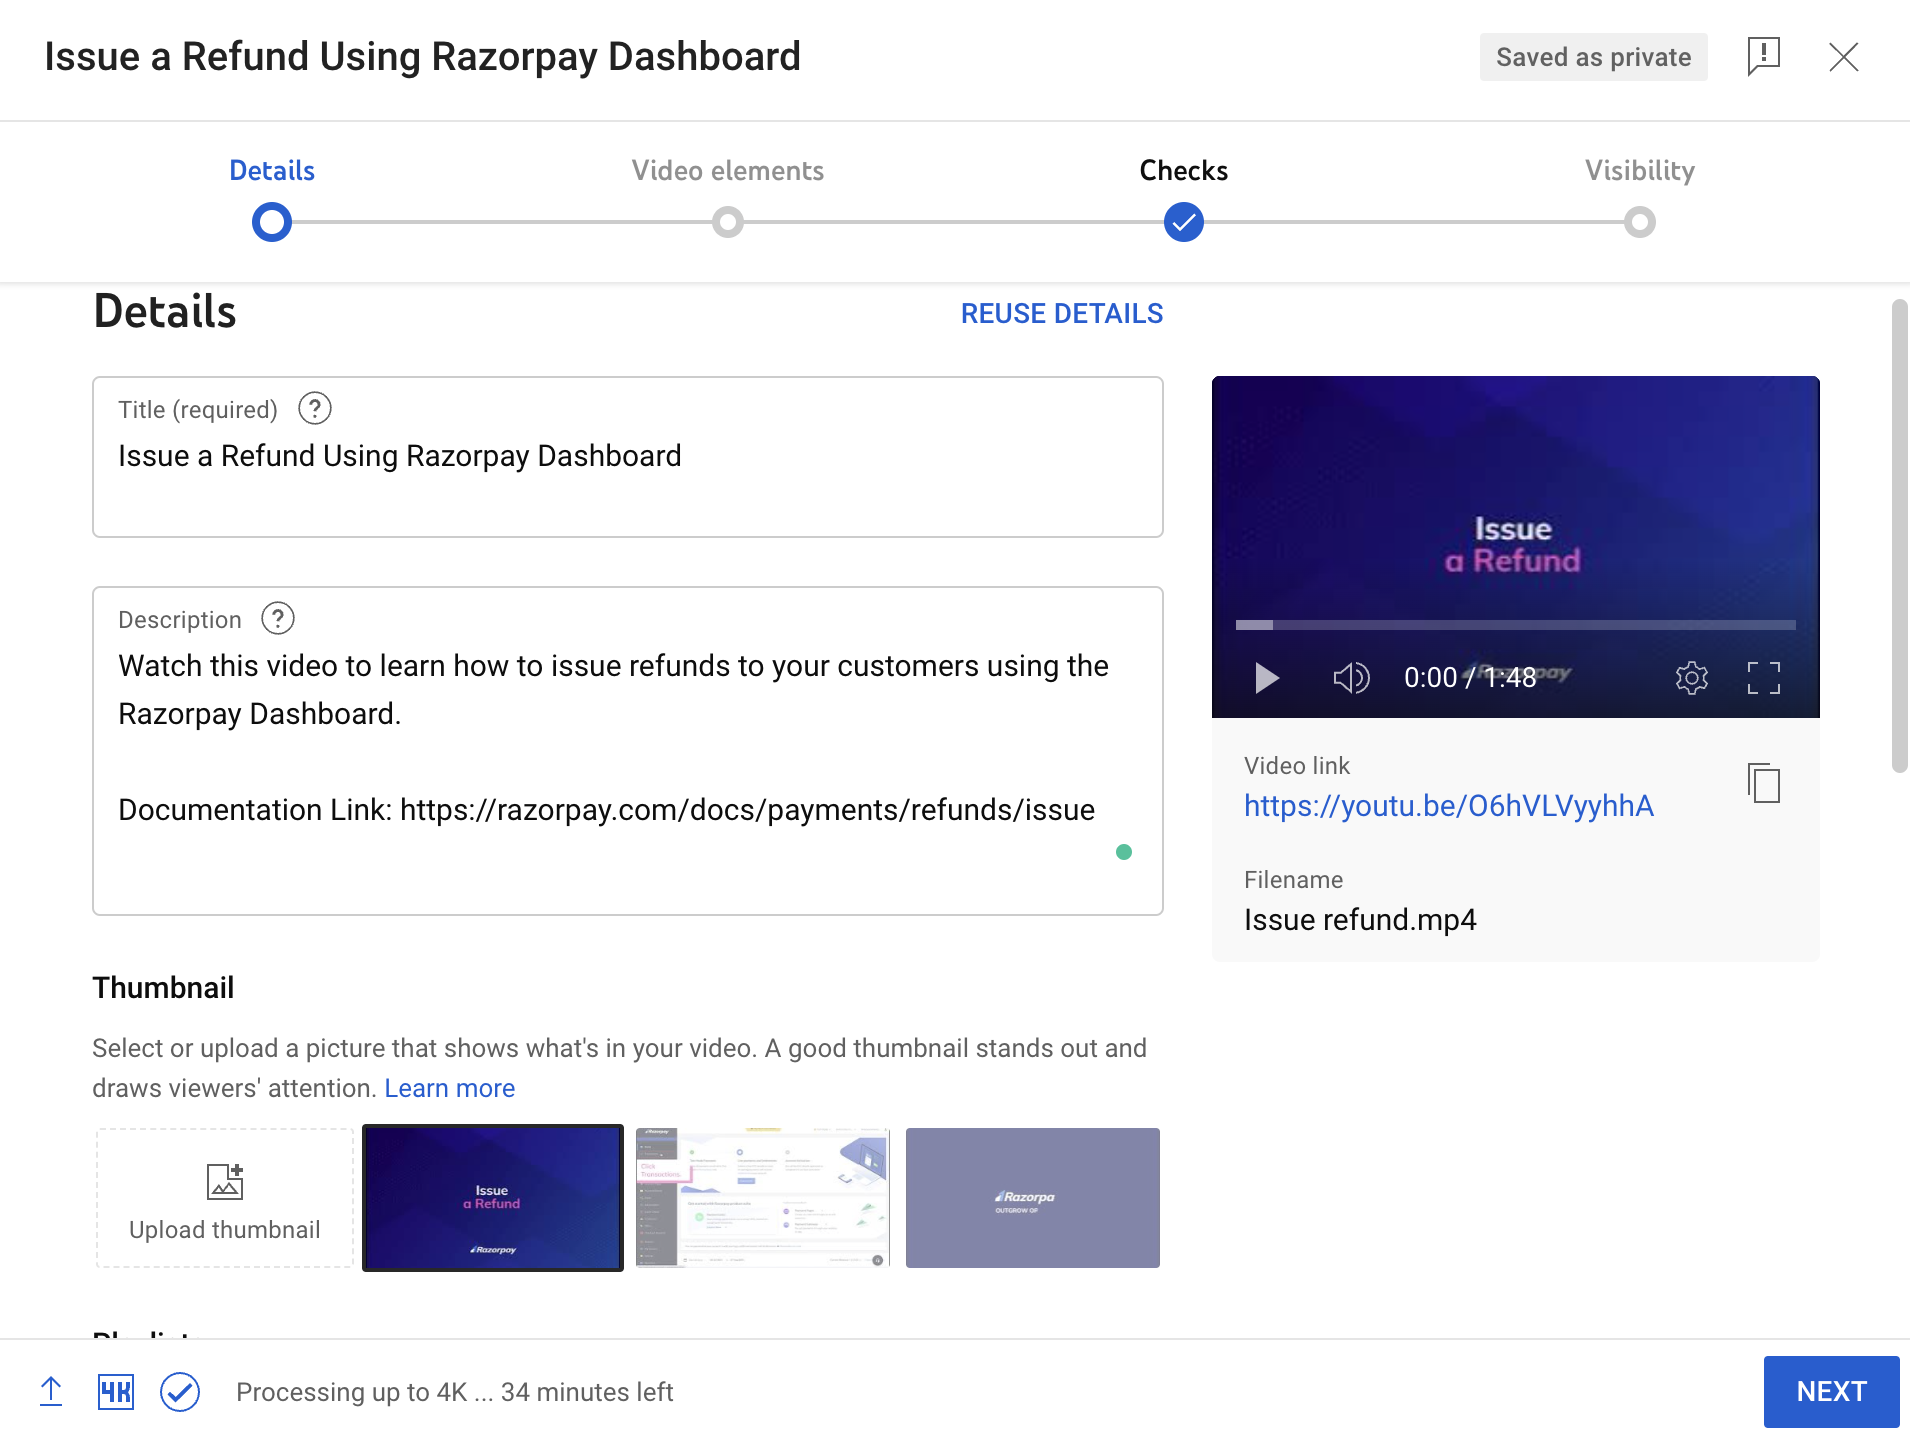
First Impressions Matter: Thumbnail Images!
Set meaningful, impressive thumbnails for your videos. YouTube auto-generates thumbnails, you may want to use one of those.
Ensure SEO is On-point
Like with other pieces of content, SEO plays a vital role in how users reach and access the video.
- Choose a proper heading and add appropriate title tags.
- Ensure that the page on which you plan to embed the video is optimised for SEO. An unoptimised page will deter search engines from crawling the content, affecting the video’s SEO rating.
Share the Video
You can embed the video on your website and/or share it on video-sharing sites such as YouTube. To promote your videos, you may consider adding the video to documentation, tweet it out, share on community forums and even append it to newsletter emails!
Track Success Metrics
Track how your video is performing such as number of views, engagement rates, likes, comments, and so on. You can revisit your video creation and marketing strategies based on these numbers.
Do not forget to check and engage with users who comment on your video. You can leverage these comments to generate more video ideas and improve existing ones.
Conclusion
Creating videos is time-consuming and requires a lot of effort. The maintenance of videos is also not easy! So consider all the facts before embarking on your video creation journey. But, the impact it can create if delivered correctly is immense. Take a wise call.


