A customer replies to your product story: “Is this available? Send the payment link.” You have already sent three photos, a size and a delivery estimate. A clear storefront brings the product photographs, price and payment destination together, helping your customer recognise the item and complete the purchase.
Most sellers hit this point once daily enquiries grow past a handful. So the practical question becomes: how can I show customers the product they are paying for and collect UPI payments from an Instagram DM without building a separate website?
Choose the payment destination around the buying journey. Use a Payment Link for an agreed amount, or a Webstore when customers need product images and a catalogue before paying.
A payment link for Instagram DM sales is a URL you share in a conversation so a customer can open a payment destination. When the customer also needs product photos and a catalogue, Razorpay Webstore provides a hosted storefront with product images, prices and payment collection. This guide uses Webstore as the no-code visual storefront throughout.
Key Takeaways
- Razorpay Webstore lets you present products with images, descriptions and prices on a hosted store, without coding a website.
- Use the Webstore URL in Instagram DMs or as a destination from your profile bio. The purchase flow opens the hosted store.
- Standard Payment Links, custom Payment Pages and Webstore serve different jobs. Choose by what the buyer needs to see.
- The official setup guide documents up to five product images per product and both Dashboard and mobile-app creation routes.
- Webstore supports UPI and other enabled account payment methods. Check the buyer experience on the devices your customers use.
- Budget separately for setup, maintenance and payment processing using the terms applicable to your account.
Can You Send Payment Links with Product Images in Instagram DMs?
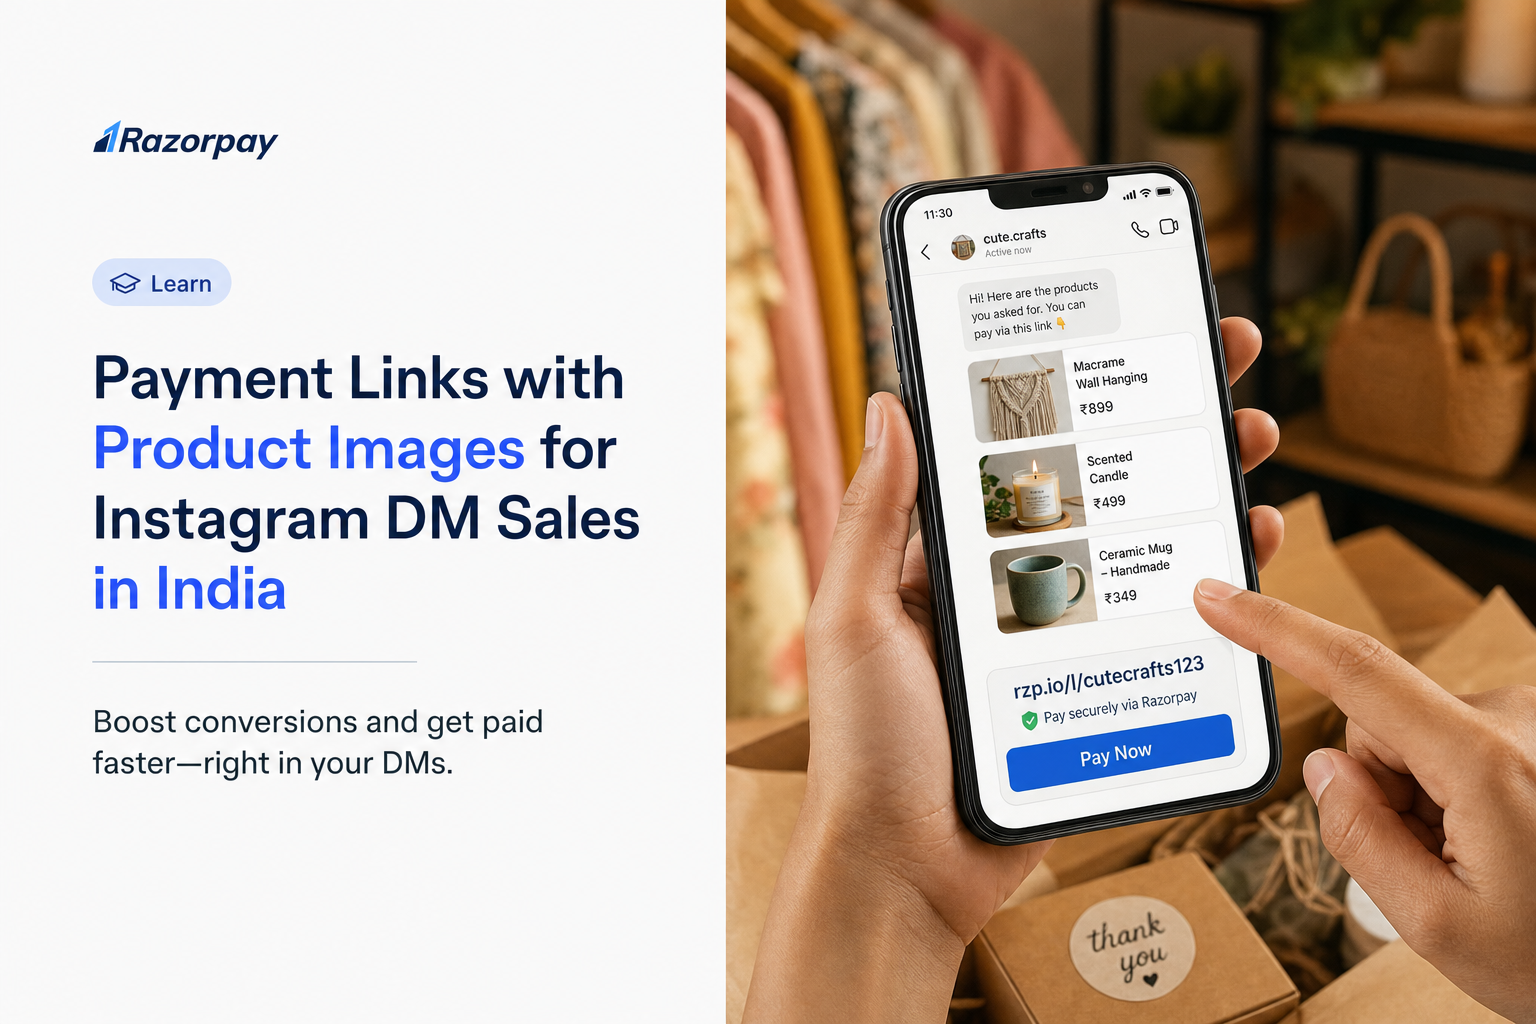
Yes, you can send a link in an Instagram DM that opens a Razorpay Webstore with product images, descriptions and prices, followed by payment collection. The photos are displayed on the hosted storefront. Choose Webstore for this visual catalogue experience; the Instagram preview and payment-method screens follow their own app layouts.
A hosted store link gives customers a destination they can open directly from your conversation, browse and use to complete payment.
Where the Product Image Appears
Preview these three parts of the journey so you can guide customers clearly.
DM conversation or preview. You can send a product photo alongside the URL manually. Whether a link preview card renders, and what it shows, is controlled by the messaging environment. Preview the link in the app and use the product name in your message so the customer can identify the item.
Hosted storefront. This is the documented surface for product imagery. The Webstore product listing is where you upload photographs and give the buyer real context: name, description, price, stock.
Payment selection and UPI app. The customer then follows the checkout flow. Product images appear on the storefront; the selected payment method and app determine the next screen.
One Confirmed Order or a Browseable Catalogue?
A simple payment request suits an amount you have already agreed in chat. A catalogue link suits a buyer who still needs to see items, compare them or choose a variant you have listed separately.
To create a visual catalogue, choose Webstore from the Payment Pages creation flow. Add product photos, descriptions and prices, then share the store URL in your conversation.
DID YOU KNOW: The Webstore creation guide documents up to five product images per listing. These are product photos, separate from your business logo, which has its own specification.
Payment Links, Payment Pages and Webstore: Which Should You Use?
Choose Razorpay Payment Links when the amount and purpose are already agreed. Choose Payment Pages when you need a customised hosted collection page. Choose Razorpay Webstore when buyers need a visual product catalogue with product details before paying. Verify the exact page and account settings before sharing it with customers.
| Buyer or seller requirement | Razorpay product to consider | What you need to know |
|---|---|---|
| Collect an agreed amount through a shareable request | Payment Links | A shareable request for an agreed amount, without building a separate website. |
| Present custom collection information on a hosted page | Payment Pages | Page content and fields depend on the chosen template and configuration. |
| Show a catalogue with product photos, prices and stock | Webstore | The documented product-centric storefront, created through Payment Pages or the mobile app. |
| Share the same catalogue through a profile and chats | Webstore URL | One store URL can collect multiple payments. Confirm the buyer selects the correct item. |
| Automatically reply to every Instagram comment | Requires a separately verified automation setup | Connect your chosen messaging-automation setup separately from the store link. |
Razorpay Payment Links are documented as URLs shared via email, SMS or social media, carrying an amount, description and expiry. Payment Pages give you a configurable hosted collection page. Razorpay Webstore is the product-centric storefront built for catalogues.
Keep the Recommendation Specific to the Seller
Use a simple decision rule: if customers need to see the product catalogue before paying, start by previewing Webstore. If they have already agreed an amount in chat, a Payment Link may be enough. Match the product to your workflow, catalogue and buyer expectations, then follow the setup and payment steps below.
How to Create a Razorpay Webstore with Product Images
To create a Razorpay Webstore, sign in, open Payment Pages and choose Webstore. Add product names, prices, stock and images; add business details; configure the store URL and settings; then publish and share the store. Complete account requirements and keep test and live environments separate before accepting real payments.
Before You Begin
Prepare product photographs you have the right to use, product names, INR prices, available quantities, a business email and phone number, and clear delivery and return information.
The Dashboard setup guide requires a Razorpay account with KYC completed. Test mode provides a sandbox with the same functionality except that real payments cannot be accepted in Test mode, and Live mode becomes available after your account is activated. A Webstore built in test mode must be created again in live mode for real selling. For the app route, use the current name, Razorpay Payments Mobile App.
The Eight-Step Setup Procedure
1. Open the right product. In the Dashboard, open Payment Pages, choose + Create Payment Page and select Create Razorpay Webstore. In the mobile app, tap Payment Pages under the ACCEPT PAYMENTS section, then + Create Payment Page, then Select Webstore.
2. Add a product. Choose Add products to this page, then Add a new product. Enter a name a buyer will recognise from your DM. Current documentation sets a 100-character product-name limit.
3. Set the price and quantity. Add the INR price and, where relevant, a discounted price and quantity in stock. Be clear about which price the buyer sees, and confirm the configuration before you publish.
4. Upload product images. Add up to five images per product. Use one clear main photograph plus detail views showing colour, scale, texture or inclusions. Supported product-image formats are JPG, JPEG, PNG and GIF. The business logo has separate size and dimension rules.
5. Add product context. Write an accurate description and add a category if it helps buyers navigate. Put sizing, material, inclusions and lead-time information where the current page supports it. For size, colour or custom choices, confirm the available selection controls and make the chosen item clear in the listing or customer conversation before payment.
6. Add your business details. Use More options to enter your business email and phone number. Add customer-facing policy information through the supported configuration and verify where it appears on the live page.
7. Configure and preview. Enter a unique store URL slug. The mobile-app guide states that adding a unique URL is required when creating your Webstore. Check expiry and confirmation settings. Review photos, amounts, stock, payment methods and the buyer flow on a phone.
8. Publish and copy or share the URL. On the Dashboard, use Publish Page and Copy. In the mobile app, publish and use Share. Send the store URL to the customer, say which product to select, record the order and verify payment status before fulfilment.
One URL detail worth planning around: custom URLs require Live Mode, you can only customise the suffix, and the FAQ confirms two Webstores cannot share the same suffix. Claim a slug close to your Instagram handle early, and avoid changing it once it sits in your profile links and saved replies.
PRO-TIP: Give the product in your DM the same name used in the Webstore. A consistent name helps the buyer select the intended listing and helps you discuss the order later when the chat has scrolled.
Check the store before sharing it
Preview the buyer-facing page on a phone. Check that each product has the correct name, price, images and available stock. Confirm that the link opens the intended store and that customers can understand the item and fulfilment terms before paying.
Use the Webstore management guide when a product or stock quantity needs updating.
How to Share Your Webstore in Instagram DMs and Your Bio
Copy the published Webstore URL and paste it into the customer conversation. Tell the buyer which product to select and confirm the total and delivery details before payment. You can also add the store URL as a destination from your Instagram profile. Customers complete checkout on the hosted store. Manage DM replies through your chosen messaging workflow.
A Practical DM Message
Here is one illustrative message you can adapt:
“Hi, the blue ceramic mug is available for Rs 799. You can view its photos and select Blue Ceramic Mug in our store here: [your published Webstore URL]. Please confirm the delivery details and final total before paying. We will confirm your order after checking the payment.”
This example uses the published store URL. Confirm availability, the chosen item and the final total, including any delivery charge, in the conversation before payment.
Use the Same Store Link from Your Bio
A visitor who taps the link from your profile opens the store, browses what is listed and selects an item. Instagram’s profile links field and its layout vary by app version and account type, so use the profile-link controls available on your account.
DID YOU KNOW: The Webstore FAQ confirms you cannot create multiple URLs for one Webstore, and that a Webstore allows you to collect multiple payments on the same link.
Check the Link as a Customer
Open the destination on a phone. Confirm the intended product is visible, priced correctly and clearly named. Distinguish an image sitting in the message from the image on the store itself. Check the page is active and live as intended.
What Does the Customer See When Paying with UPI?
A customer opens the shared Webstore, selects products, supplies the requested details, chooses an enabled payment method and completes payment. UPI is among the documented methods. Product photos provide context on the storefront; the subsequent payment interface depends on the selected method, device and current checkout configuration.
Explain the Buyer Journey in Plain Language
- The buyer receives the link in your DM or taps it from your profile.
- The store opens and they view product images, names and prices.
- They select the product and enter the details the page requests.
- They choose a payment method and complete payment.
- They see the configured confirmation while you check the transaction record.
That sequence matches the documented behaviour of how Webstore works. The About Webstore page lists card, netbanking, UPI and wallets, and the FAQ notes that the methods displayed are those enabled on your account. Preview the checkout configuration on your customers’ devices so your instructions match the payment journey they see.
Payment Confirmation Is Different from Settlement
A successful payment and money reaching your bank account are two separate events. Use the transaction record to verify payment, and your account’s settlement information for bank-credit timing. The documented domestic standard is a T+2 working-day settlement cycle, subject to bank approval and variable by business vertical and risk factors.
PRO-TIP: Before sharing the store widely, review the buyer flow on the phones and browsers your audience actually uses.
Is a Razorpay Link-in-Bio Store Free? Understand the Costs
Separate the cost of creating or maintaining a storefront from payment-processing fees. Razorpay’s public standard gateway pricing states zero setup and annual maintenance charges, with standard processing or platform fees. Use the Webstore-specific commercial terms and your account rate to calculate the full cost, including UPI processing or platform charges where applicable.
Explain Each Cost Separately
| Cost or condition | What applies | What to check for your account |
|---|---|---|
| Standard gateway setup | Public pricing states zero setup fees | This is the general gateway position. Confirm Webstore-specific terms. |
| Standard gateway annual maintenance | Public pricing states zero AMC | Confirm any Webstore-specific plan or service charges. |
| Processing or technology fee | Standard public rate is 2% plus GST | Your account agreement, method and approved commercial terms govern. |
| Standard bank-account UPI | Zero bank-level MDR is distinct from a gateway technology fee | Include the applicable gateway or platform fee in your UPI cost estimate. |
| Optional services and promotions | Separate fees or eligibility conditions can apply | Check the offer duration, eligibility and regular rate after the offer. |
| Delivery and fulfilment | You must confirm what the order includes | Pair payment collection with your shipping or digital-delivery workflow. |
Razorpay’s pricing explainer confirms no setup charges and no annual maintenance charges for standard accounts, and notes that for UPI, where MDR is zero by mandate, the 2% functions as a platform fee. Recheck the current position on Razorpay pricing before you plan margins.
A Small, Clearly Labelled Calculation
Take an illustrative Rs 1,000 successful payment. At a 2% fee, the fee is Rs 20. Applicable GST is charged on that fee, so the deduction is Rs 20 plus applicable GST. This is arithmetic for illustration, not a quote or a tax ruling, and processing charges remain separate from delivery charges.
Plan your store’s operating costs
Check the cost of the store, the cost per successful payment and any optional services together, then price your products with all three in view. For broader background on bio-based selling, see our guide to link-in-bio stores with UPI.
How to Track Orders, Payments and Stock After a DM Sale
Use the Webstore transaction view to inspect payments and linked order details, and maintain each product’s available quantity. Confirm the payment state before fulfilment and keep the customer’s product and delivery details aligned with the order.
Find the Payment and Order Details
The creation guide’s transaction section documents the path: navigate to Payment Pages, select Razorpay Webstore, open the relevant store, select the payment ID, check the order details, then click the order ID to view the customer’s address details. Handle those details carefully.
Confirm the paid status in your merchant transaction record before marking the order as paid. If a buyer reports a debit but your status is unclear, use the official support flow before asking for another payment or dispatching the item.
Keep Stock and Product Information Current
The manage Webstore guide documents editing page content and using Update Stock, where you can either set stock to No Limit or enter a specific quantity. Review stock after each DM sale. Keep quantities aligned with your other sales channels through your inventory process.
DID YOU KNOW: The Webstore FAQ states that if all items go out of stock, the Webstore still remains active while all products show an Out of Stock label.
Connect payments with your fulfilment process
Tell the buyer who handles delivery, the expected dispatch date and how to reach you. Pair the payment page with your shipping or digital-delivery workflow, and test the handoff from confirmed payment to fulfilment.
Make Product Images and Mobile Checkout Clear
Use clear product photos, accurate names, visible prices and concise descriptions so a buyer arriving from Instagram can identify the right item. Check the actual store on mobile. Show the item and delivery information clearly on the storefront or in your customer message.
A Useful Product-Listing Checklist
- Use an original photograph of the actual product.
- Show colour, scale or the detail a buyer asks about most.
- Keep item names consistent between DMs and listings.
- State clearly what the price includes.
- Give a realistic lead time for handmade or made-to-order items.
- Check availability before you share the link.
- Explain delivery and returns through the supported page or in your message.
Use the supported JPG, JPEG, PNG or GIF formats for product photos and preview their appearance in the listing. Follow the separate branding specifications when uploading your business logo.
Trust Comes from Accurate Expectations
Use a recognisable business name, working contact details, a clear description and a correct total to help customers understand the purchase. Add your business logo and theme colour through the supported branding settings for a consistent store appearance.
PRO-TIP: Ask a colleague to open the link as a buyer and tell you the item, total, delivery promise and seller contact details without any help. Fix whatever they cannot find.
Practical Checks for Your Webstore
Check the store’s status, unique URL, stock and account-enabled payment methods when a buyer cannot complete the intended flow. Connect any additional automation or fulfilment workflow as a separate part of your setup.
The URL slug is unavailable. Suffixes are globally unique, so choose a recognisable variant. The Webstore FAQ documents this conflict and the Live Mode requirement for custom URLs.
The store does not accept the intended purchase. Check live versus test mode, active versus inactive state, expiry and stock before escalating. The FAQ also documents a default per-payment maximum of Rs 5,00,000.
A product image does not upload. Check the documented formats. Logo-specific rules do not apply to product photographs.
The desired payment method is absent. Check which methods are enabled on your account and raise a support request where required.
You need a large catalogue. Verify the current product limit in the documentation for your account before migrating listings.
You need auto-DM, shipping automation, digital delivery, complex variants or subscriptions. Each requires a separately verified setup.
Frequently Asked Questions
Can I add product images to a Razorpay Payment Link?
For a browseable catalogue with product photos, use Razorpay Webstore, created from the Payment Pages flow. Its creation guide documents up to five images per product listing. Use this Webstore flow when you want customers to browse product photos before paying.
Can I create a Razorpay Webstore from a mobile app?
Yes. The Razorpay Payments Mobile App documentation describes opening Payment Pages, selecting Webstore, adding product details and images, configuring the store with a unique URL and sharing it. Verify live readiness before collecting real payments from customers.
Can I put a Razorpay Webstore link in my Instagram bio and accept UPI?
You can use the hosted store URL as a destination from your profile and share it in customer conversations. Webstore documents UPI among its payment methods, subject to the options enabled on your account. Customers open the hosted Webstore from Instagram and complete payment there.
Is Razorpay Webstore completely free, including UPI transactions?
Razorpay’s standard gateway pricing states zero setup and annual maintenance charges. Payment-processing or platform fees still apply, including the applicable UPI fee. Confirm Webstore-specific terms and your account rate when budgeting for the store.
Does the Webstore link show the product image inside Instagram or the UPI app?
The documented image support sits on the hosted Webstore. A DM preview and a UPI payment screen are separate surfaces whose behaviour can vary by app and device. If the buyer must identify a particular item, name it in the message and make it clear on the storefront.