> ## Documentation Index
> Fetch the complete documentation index at: https://razorpay-881012b3.mintlify.site/llms.txt
> Use this file to discover all available pages before exploring further.
# Web Integration - Razorpay Custom Checkout
> Integrate Razorpay Custom Checkout with your website to start accepting payments.
Available in
🇮🇳 India
Integrate Razorpay Payment Gateway with your Custom Checkout. You can build a checkout form to suit your unique business needs and branding guidelines.
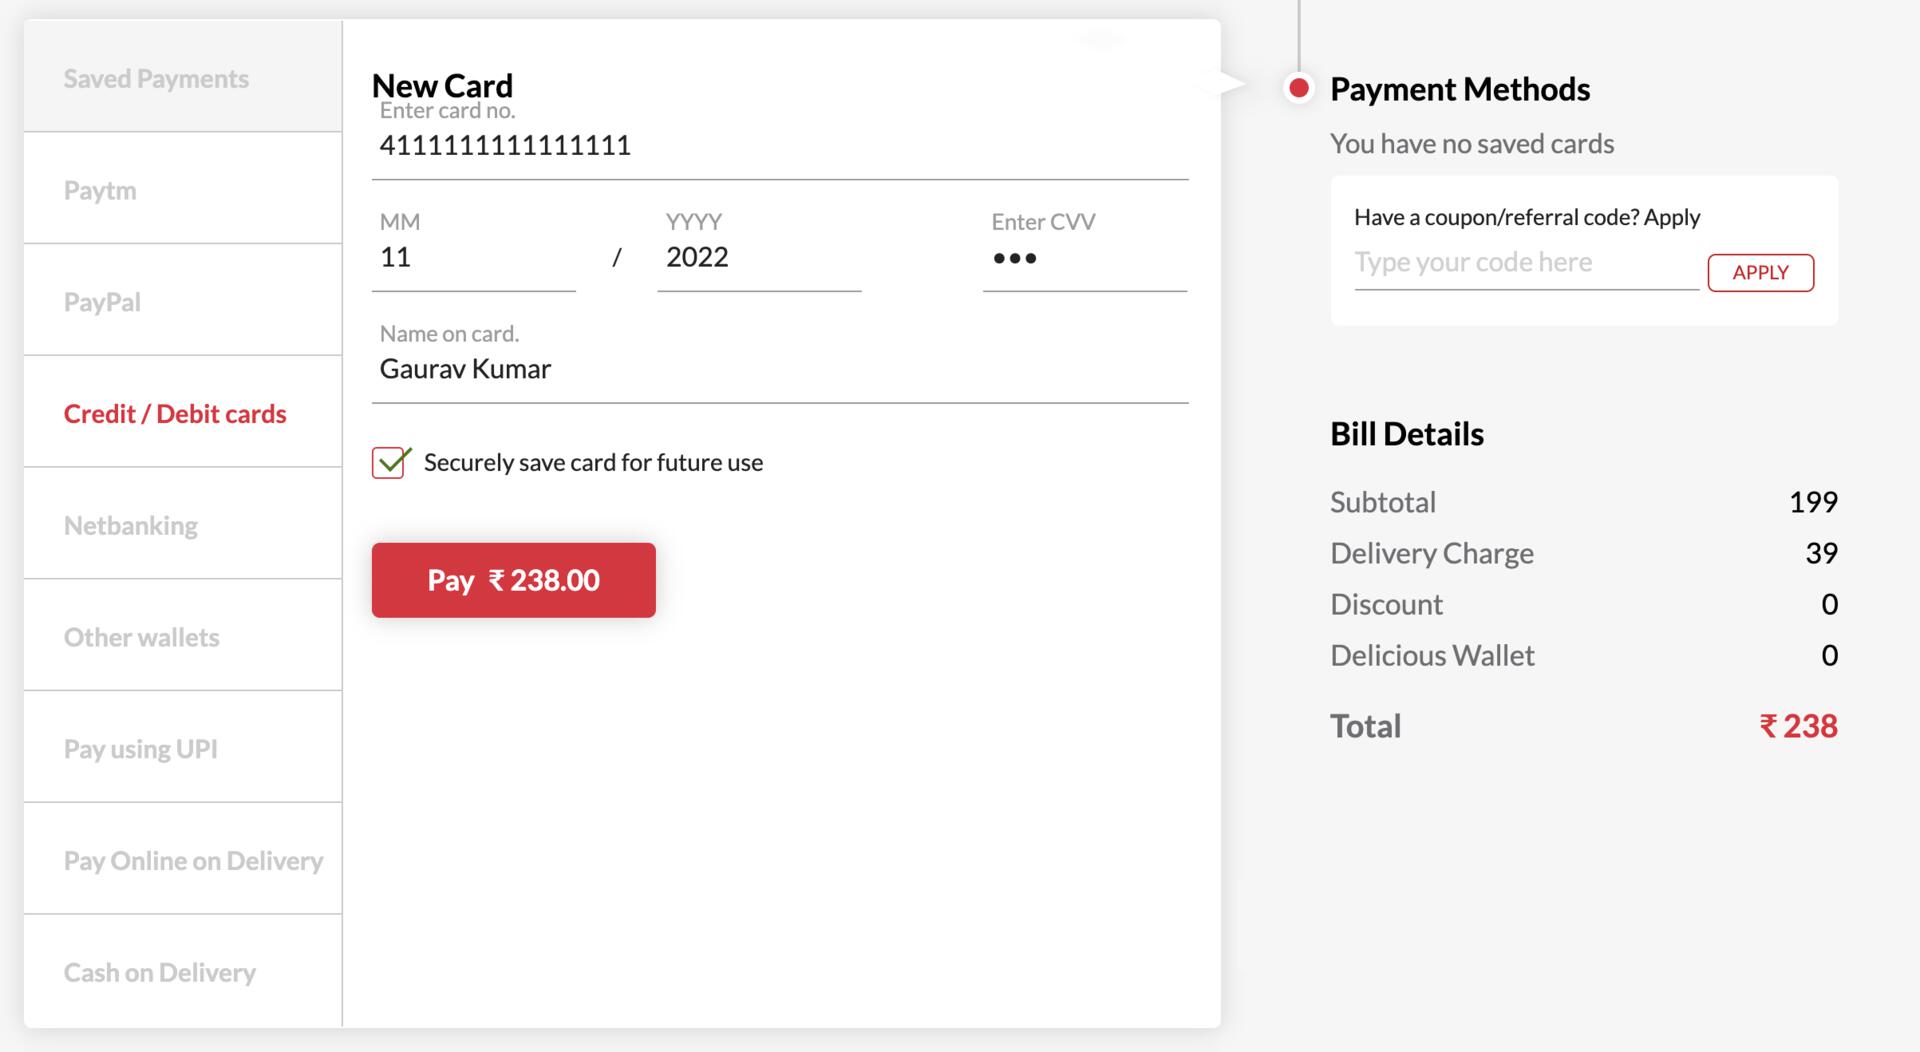 Custom Checkout's JavaScript library lets you customise the checkout interface at a granular level. For example, you can white-label the checkout to:
* Display only the select payment methods.
* Integrate external wallets such as Paytm.
* Modify the look and feel of Checkout.
**Watch Out!**
You can accept payments **only** from those websites that you had registered with us at the time of [account setup](/docs/payments/set-up). Razorpay **fails** the payments received on the **unregistered websites**. If you want to accept payments from multiple websites, contact our [Support team](https://razorpay.com/support/) to register additional websites for your account.
## Prerequisites
Before integrating with the Checkout, run through this checklist:
* Create a [Razorpay account](https://dashboard.razorpay.com/signup).
* Generate the [API Keys](/docs/api/authentication#generate-api-keys) from the Dashboard. To go live with the integration and start accepting real payments, generate Live Mode API Keys and replace them in the integration.
* Know about the [Razorpay Payment Flow](/docs/payments/payment-gateway/how-it-works).
**Watch Out!**
A customer's payment information should never reach your servers unless you are PCI-DSS certified.
## Integration Steps
Follow these integration steps:
1. Build Integration
* [E-Commerce](/docs/payments/payment-gateway/web-integration/custom/chargeback/build-integration-ecommerce)
* [Hotel](/docs/payments/payment-gateway/web-integration/custom/chargeback/build-integration-hotel)
* [Travel](/docs/payments/payment-gateway/web-integration/custom/chargeback/build-integration-travel)
2. [Test Integration](/docs/payments/payment-gateway/web-integration/custom/chargeback/test-integration)
3. [Go-Live Checklist](/docs/payments/payment-gateway/web-integration/custom/chargeback/go-live-checklist)
### Related Information
* [Best Practices](/docs/payments/payment-gateway/web-integration/custom/best-practices)
* [Address Verification System](/docs/payments/international-payments/address-verification-system)
Custom Checkout's JavaScript library lets you customise the checkout interface at a granular level. For example, you can white-label the checkout to:
* Display only the select payment methods.
* Integrate external wallets such as Paytm.
* Modify the look and feel of Checkout.
**Watch Out!**
You can accept payments **only** from those websites that you had registered with us at the time of [account setup](/docs/payments/set-up). Razorpay **fails** the payments received on the **unregistered websites**. If you want to accept payments from multiple websites, contact our [Support team](https://razorpay.com/support/) to register additional websites for your account.
## Prerequisites
Before integrating with the Checkout, run through this checklist:
* Create a [Razorpay account](https://dashboard.razorpay.com/signup).
* Generate the [API Keys](/docs/api/authentication#generate-api-keys) from the Dashboard. To go live with the integration and start accepting real payments, generate Live Mode API Keys and replace them in the integration.
* Know about the [Razorpay Payment Flow](/docs/payments/payment-gateway/how-it-works).
**Watch Out!**
A customer's payment information should never reach your servers unless you are PCI-DSS certified.
## Integration Steps
Follow these integration steps:
1. Build Integration
* [E-Commerce](/docs/payments/payment-gateway/web-integration/custom/chargeback/build-integration-ecommerce)
* [Hotel](/docs/payments/payment-gateway/web-integration/custom/chargeback/build-integration-hotel)
* [Travel](/docs/payments/payment-gateway/web-integration/custom/chargeback/build-integration-travel)
2. [Test Integration](/docs/payments/payment-gateway/web-integration/custom/chargeback/test-integration)
3. [Go-Live Checklist](/docs/payments/payment-gateway/web-integration/custom/chargeback/go-live-checklist)
### Related Information
* [Best Practices](/docs/payments/payment-gateway/web-integration/custom/best-practices)
* [Address Verification System](/docs/payments/international-payments/address-verification-system)